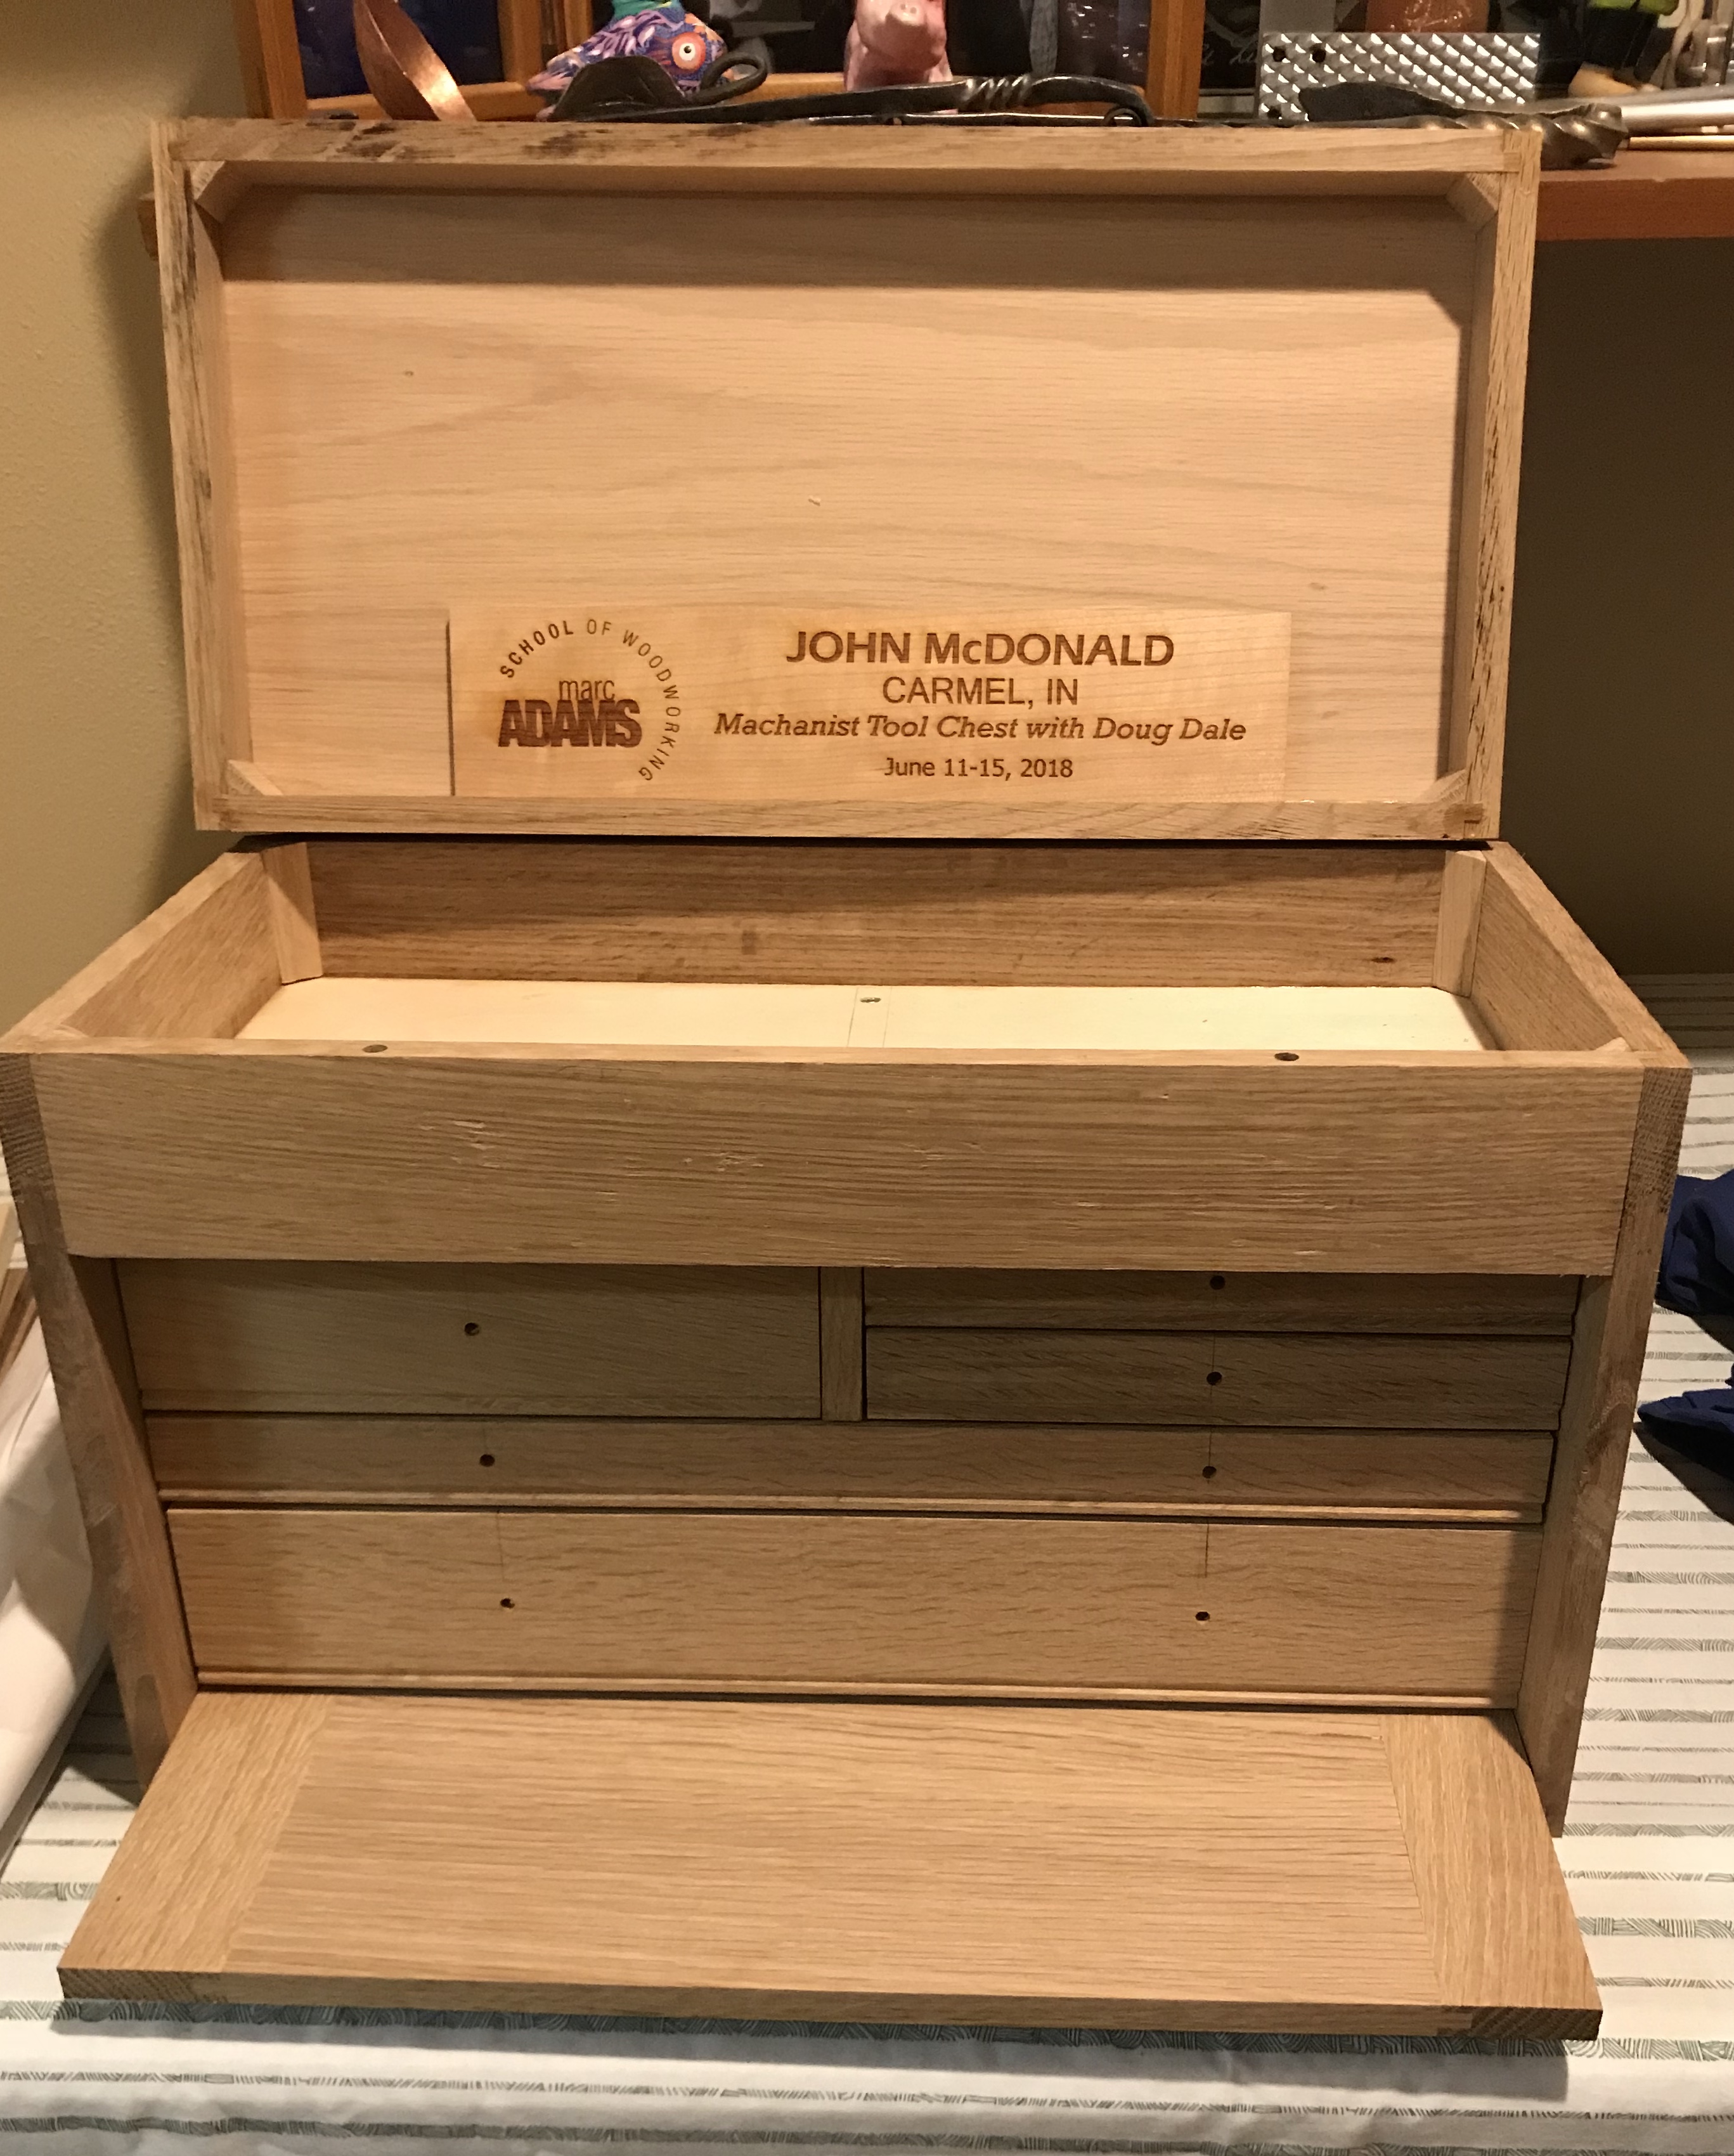
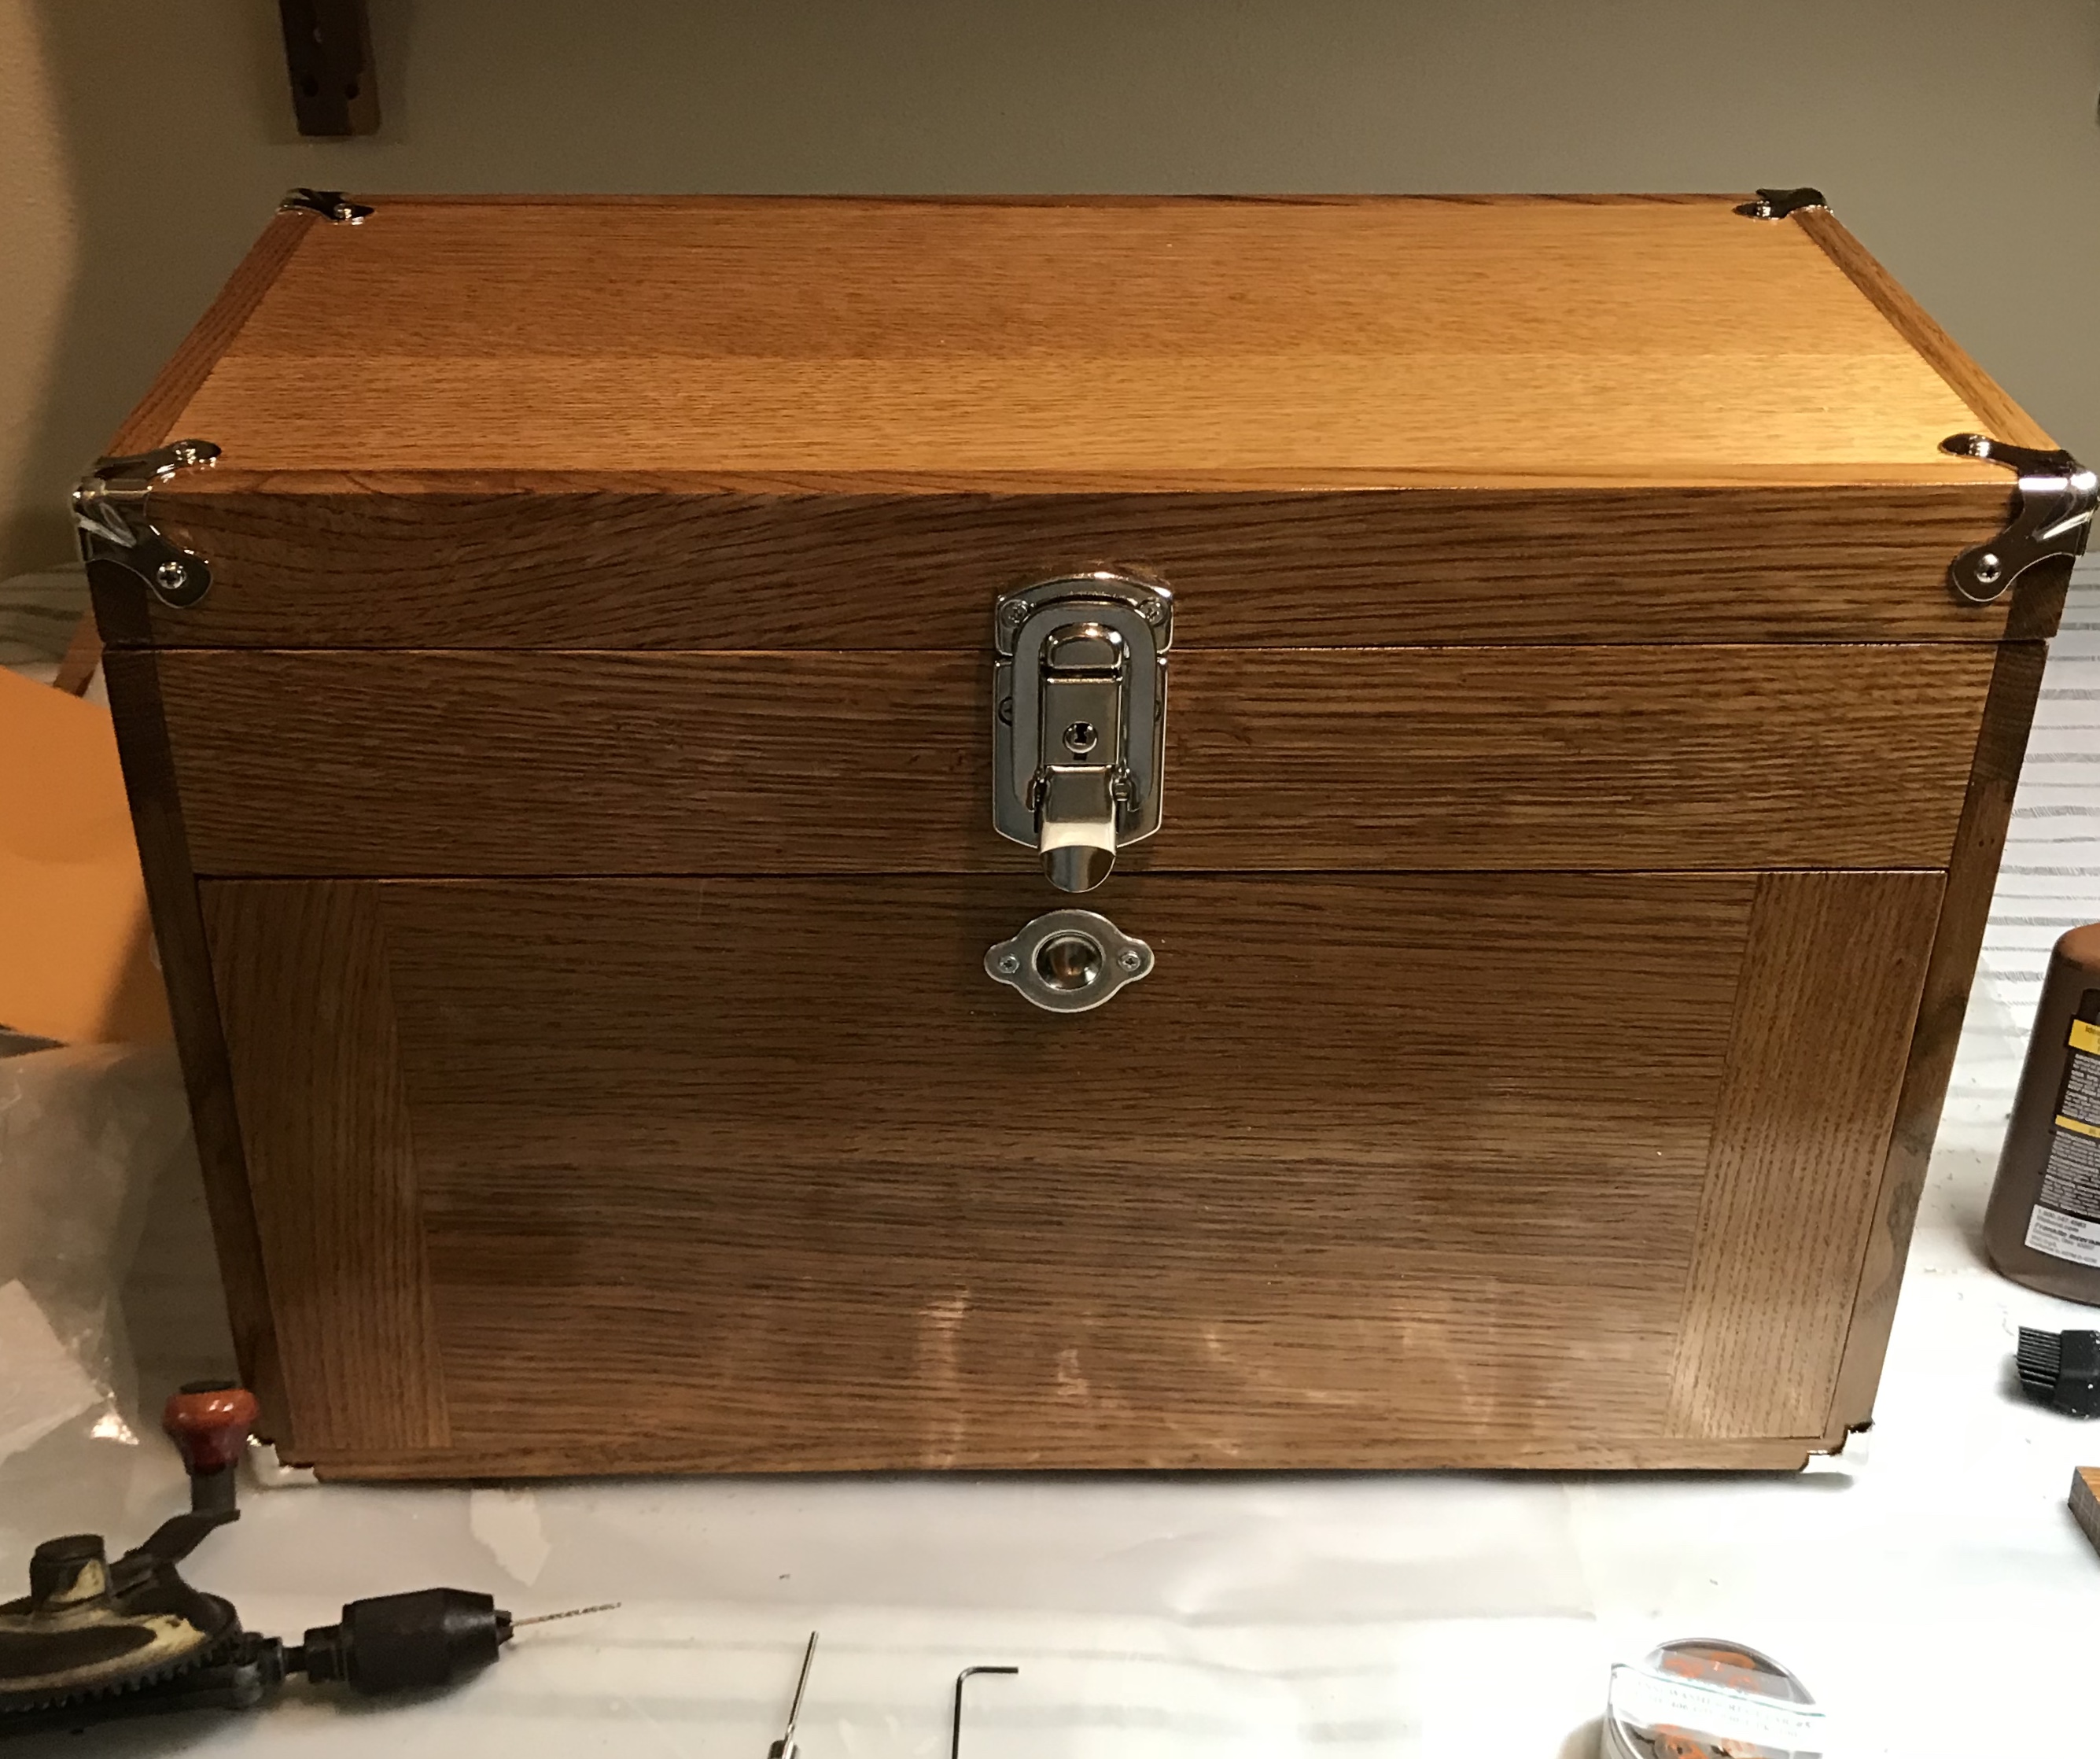
I took a class on building a Machinist's Tool Chest taught by Doug Dale at Marc Adam's School of Woodworking. Plans were provided as well as detailed instructions. Doug and the assistants set up all of the saws, routers, and drill presses with jigs and accurate measurements to make all of the parts. We were led through the assembly process and left with a completed box and drawer set after a solid week's work.
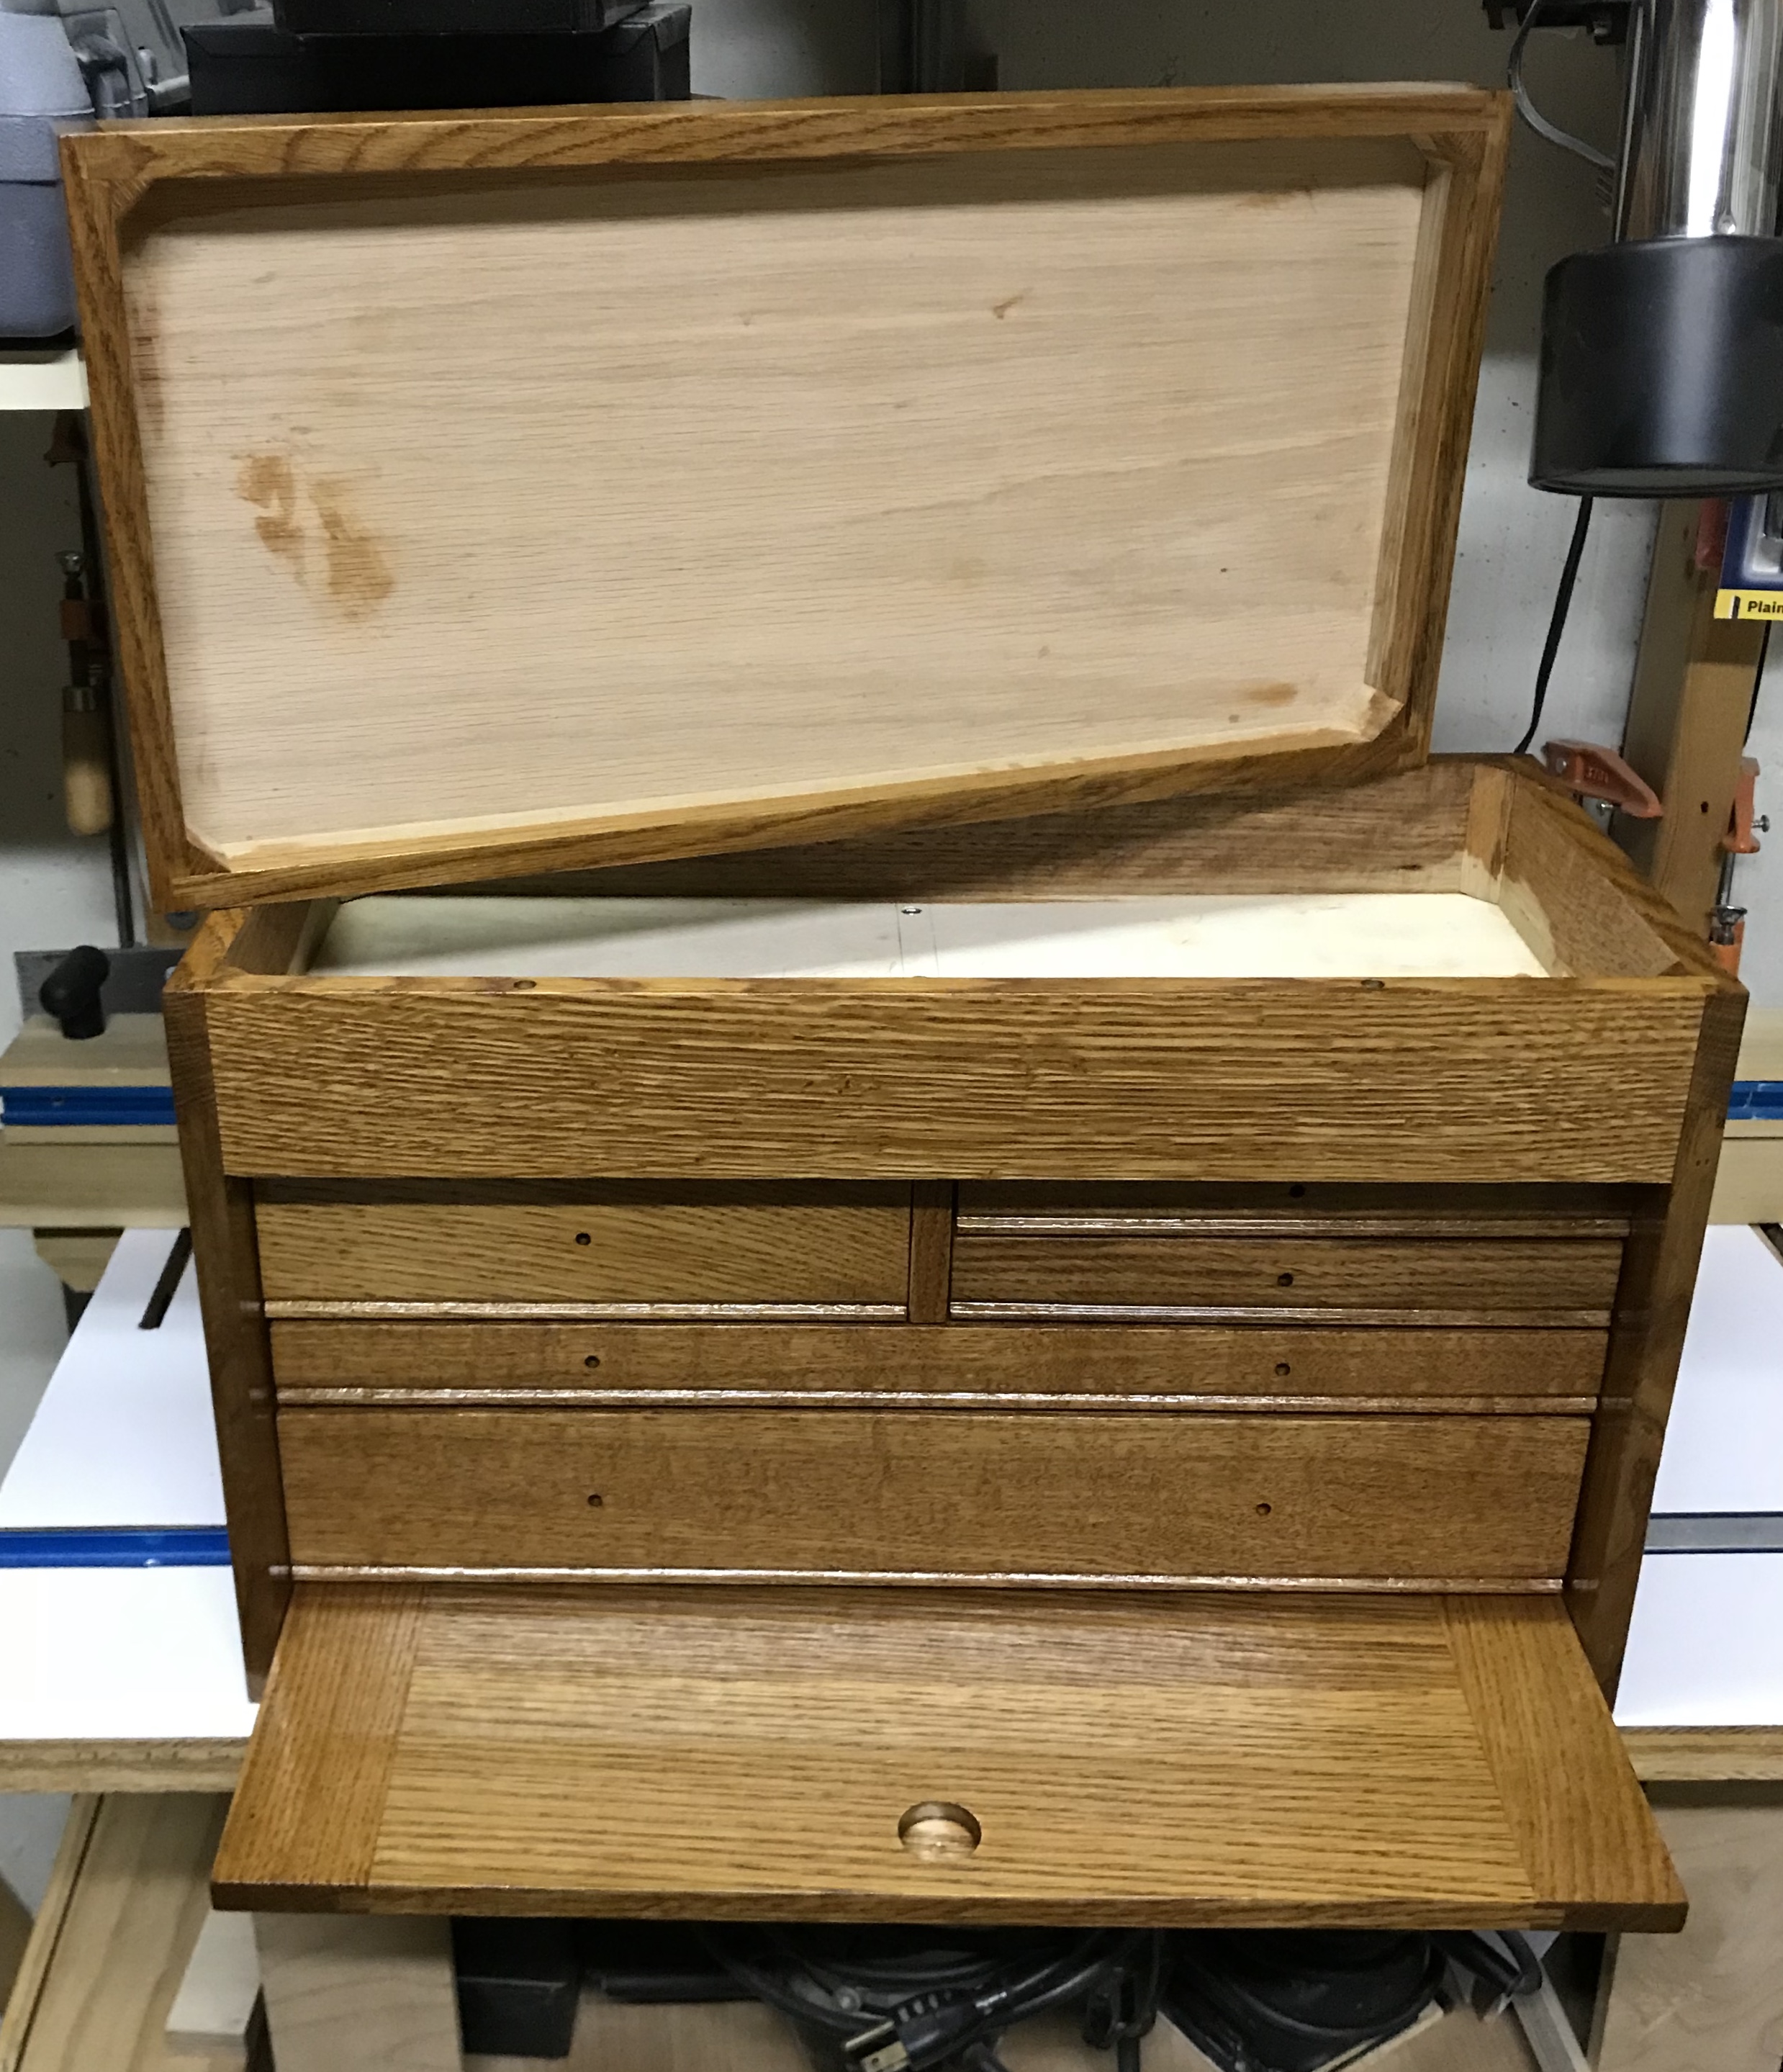
A few repairs were needed before finishing. Two of the corners had some chip out and the hole for the front face pull was drilled on the wrong side. Small pieces of wood were cut to fit (oversize) the damaged areas glued in place and . These were then sanded down to match the surfaces of the box. A plug was made from oak in the lathe to fit the mis-drilled hole. After gluing in place the plug was sanded flat to the surface of the box front. The other side of the front was then drilled to fit the pull. The box, lid, front, and drawer fronts were sanded to 150 grit and stained with golden mahogany stain. The parts were then painted with four thin coats of shellac, sanding lightly between coats with 150 grit paper.
Some of the hardware was then installed. The side handles just needed to be screwed into place. Hinges were set about 4" in from the sides. A transfer punch was used to mark the top and the front for the locking pins. The front was drilled 9/64" and the front rail holes were opened to 9/64" as well. The top was drilled about 1/16" deep with a 3/8" drill. The locking pin hardware was installed per the included instructions. The lock was installed followed by pressing the knobs into the drawer fronts.
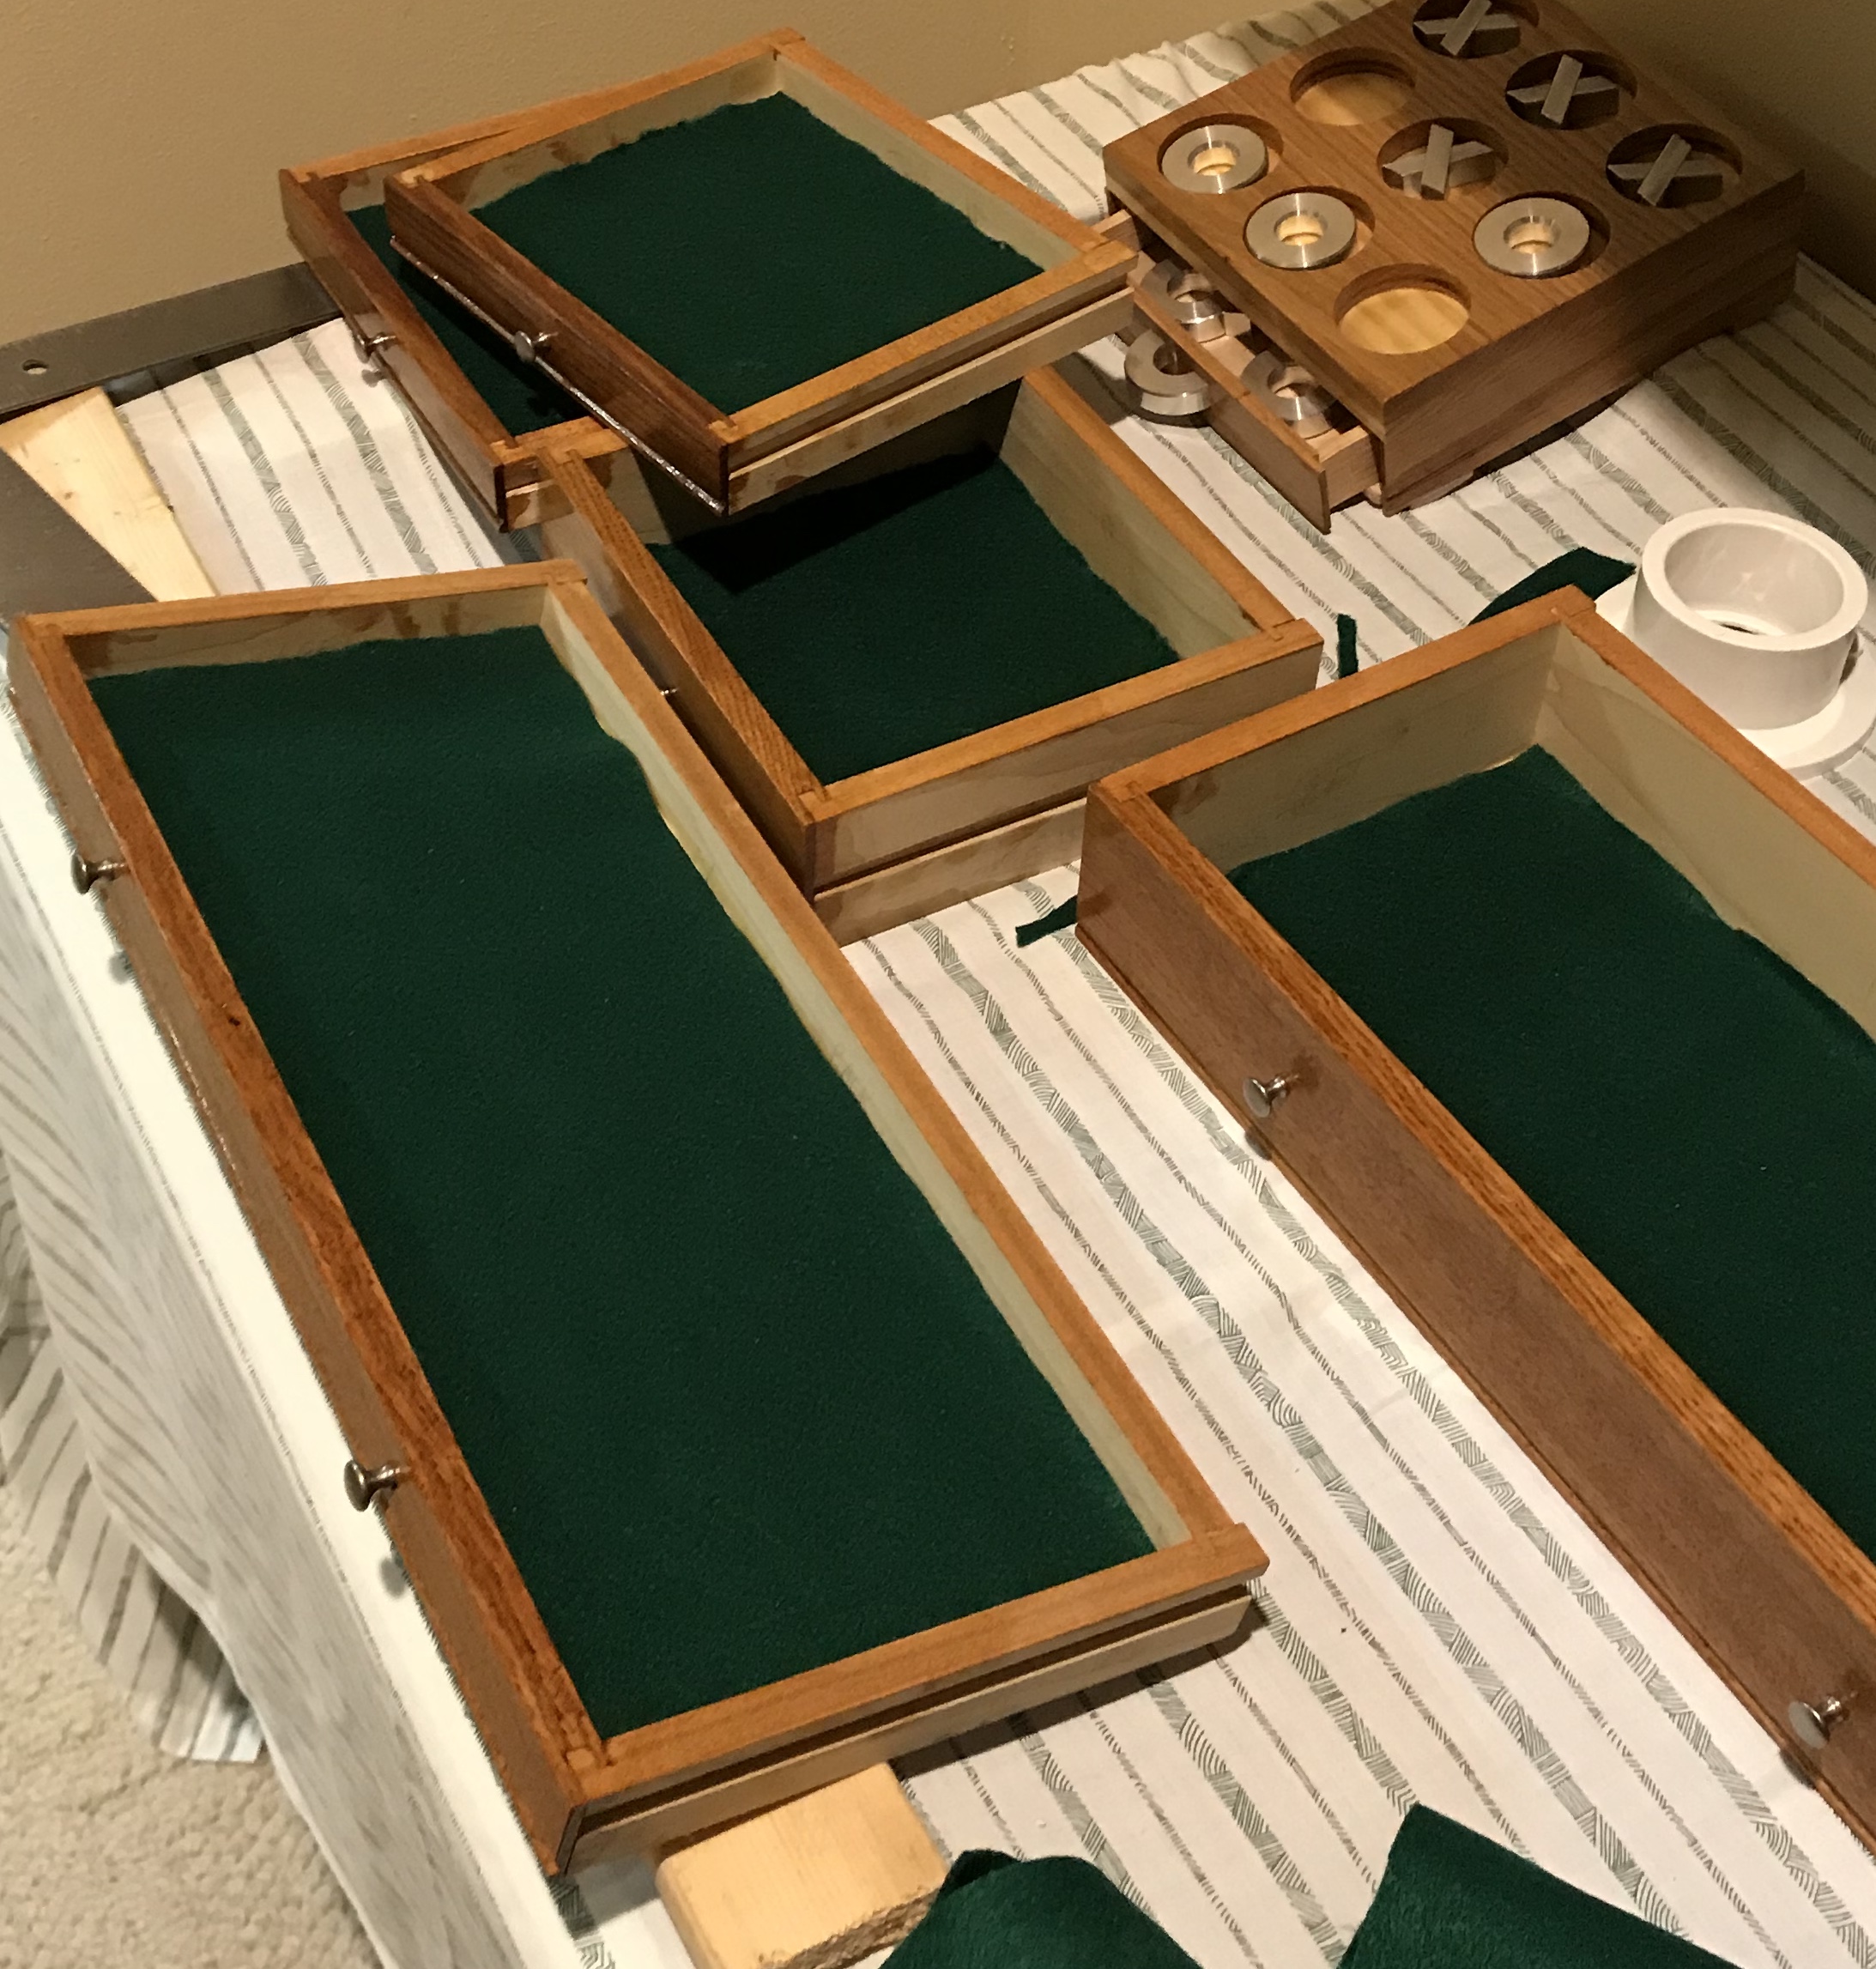
1.5 yards of green felt was purchased at Jo-Ann's Fabric. It was cut to fit the drawer, top and lid bottoms using both a razor in the corners of the box and scissors. Some minor cutting was needed to fit the felt in the bottoms. Hide glue was spread with a silicone brush in the bottoms and the felt was pressed into place. A small wooden block was used to press the felt into the corners as well as making sure it was pressed down all across the bottom of the boxes. Two long strip of 2" and 1" felt was cut for covering the sides of the top and the lid, respectively. This was put in place and further trimmed to accurately fit the sides. The sides were painted with hide glue and the felt pressed in place as before. This required very exacting work to get it to look nice.
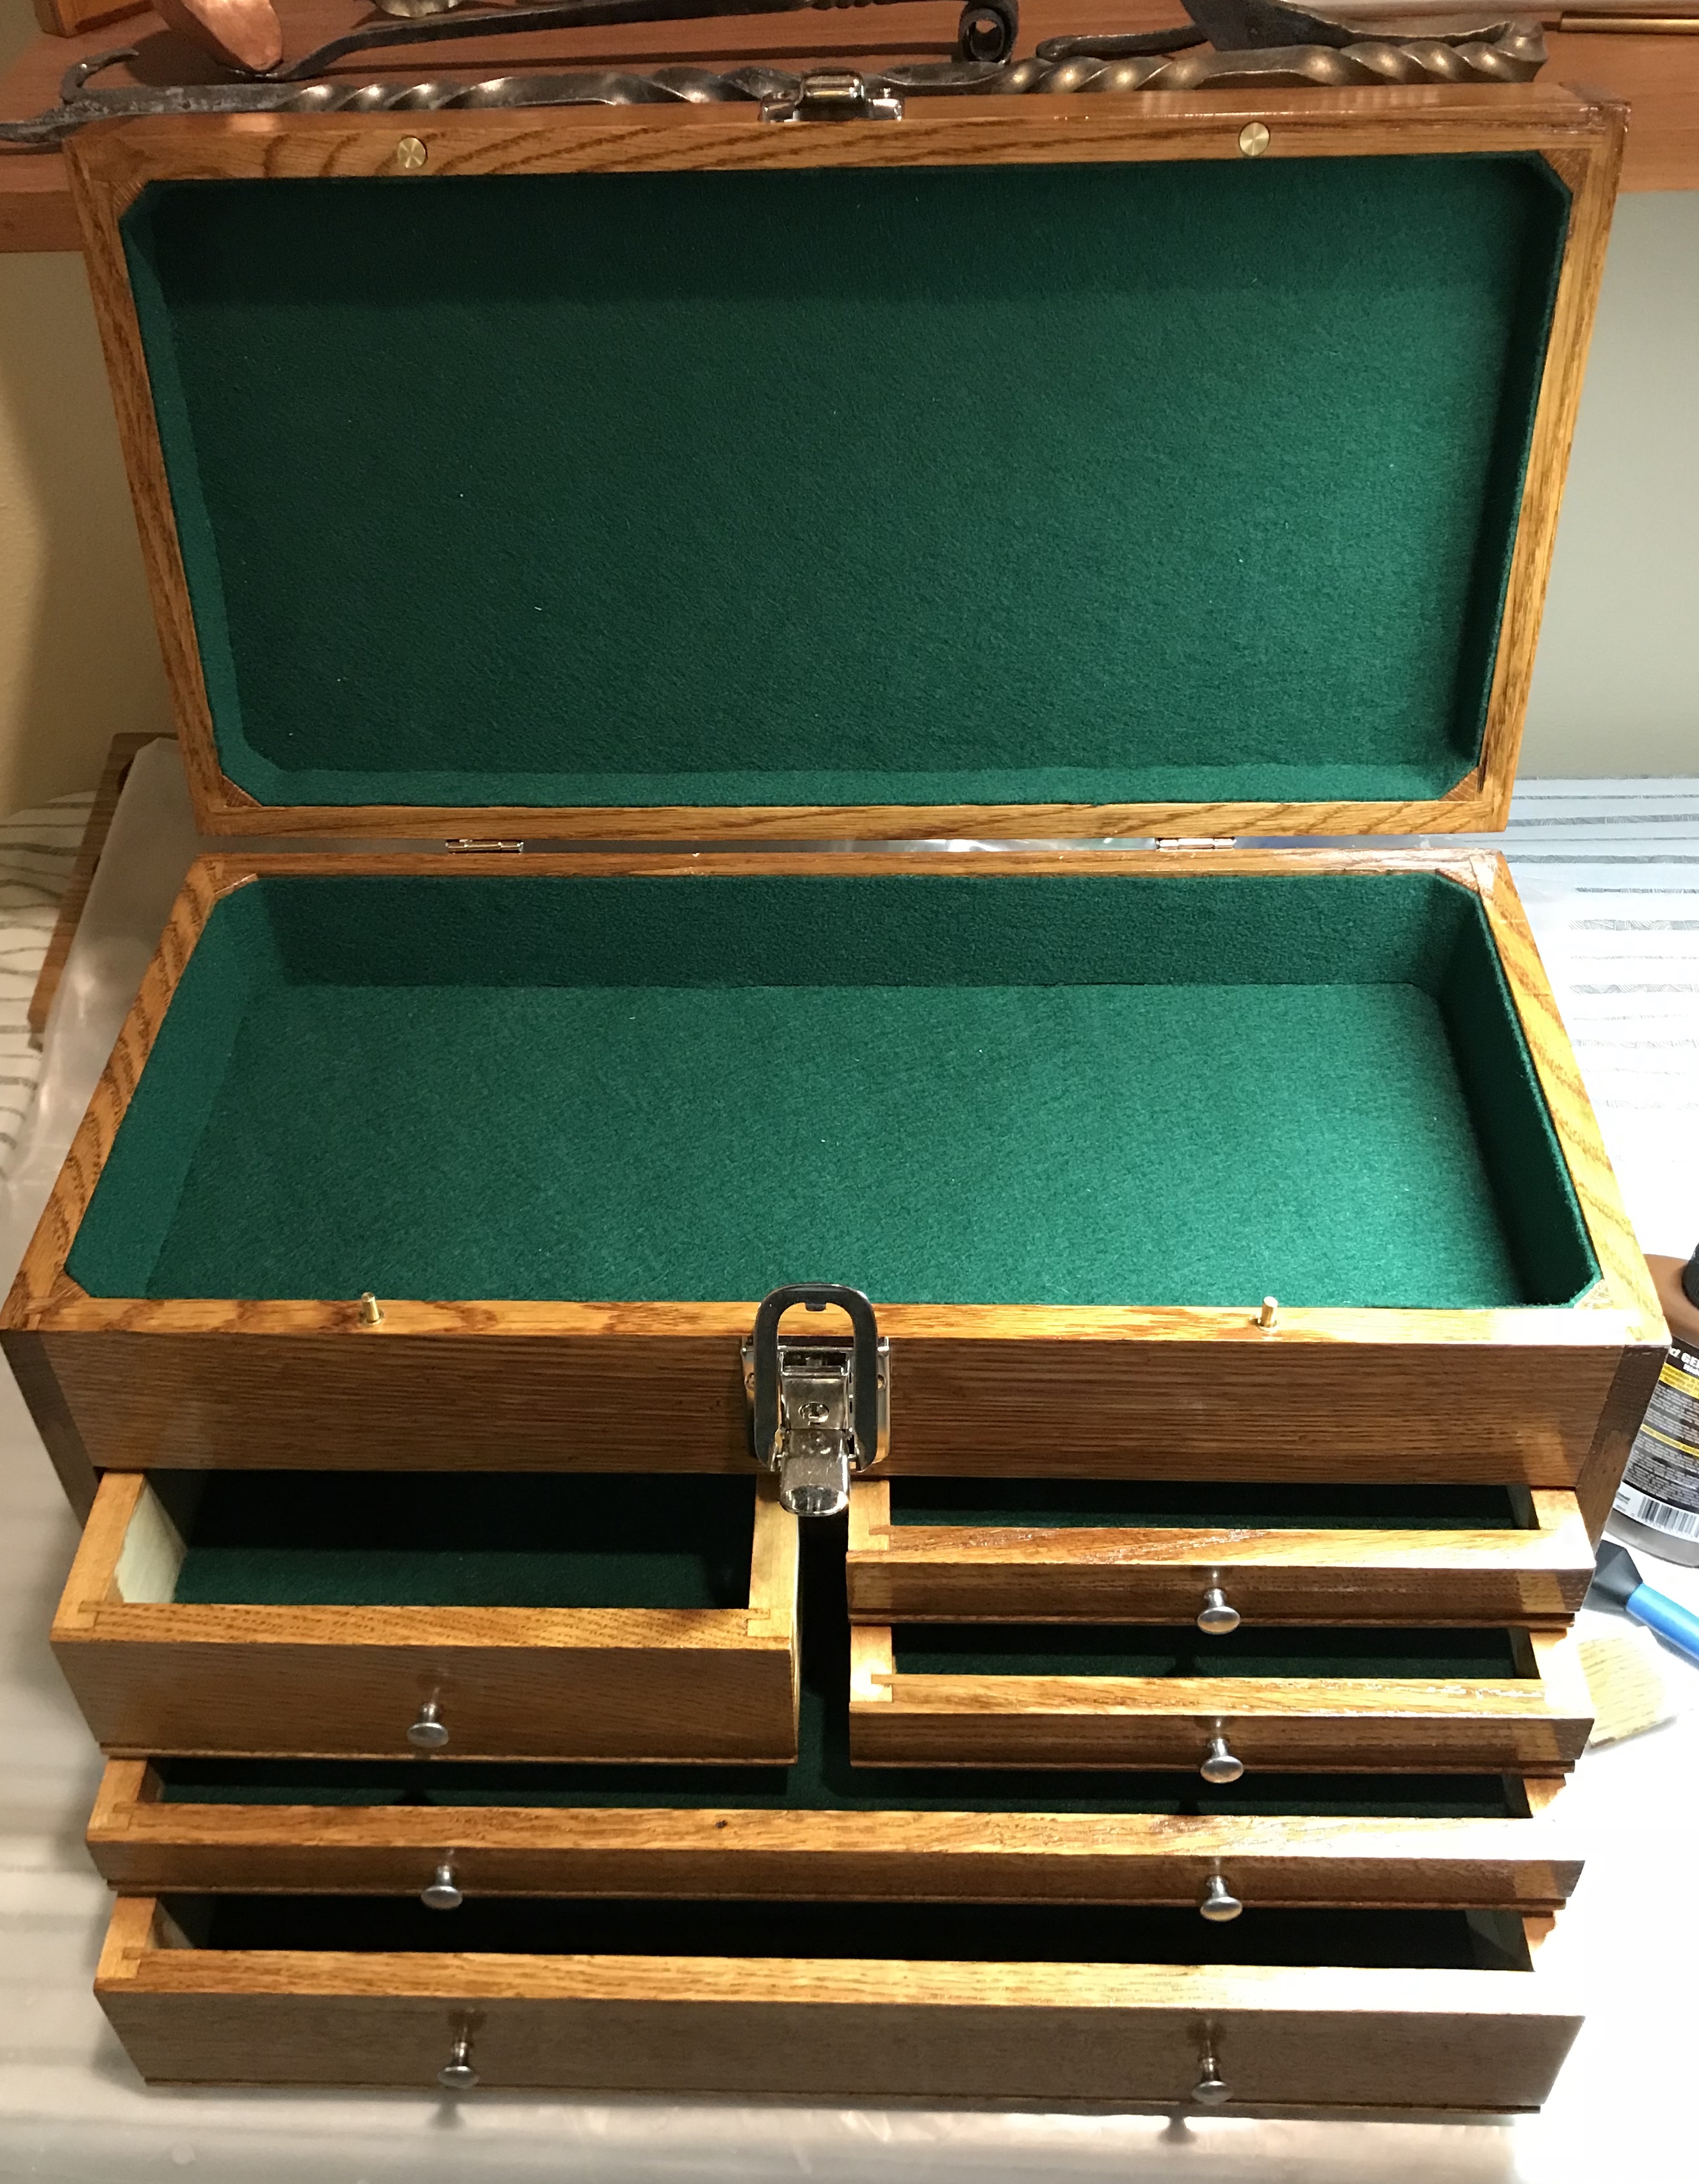
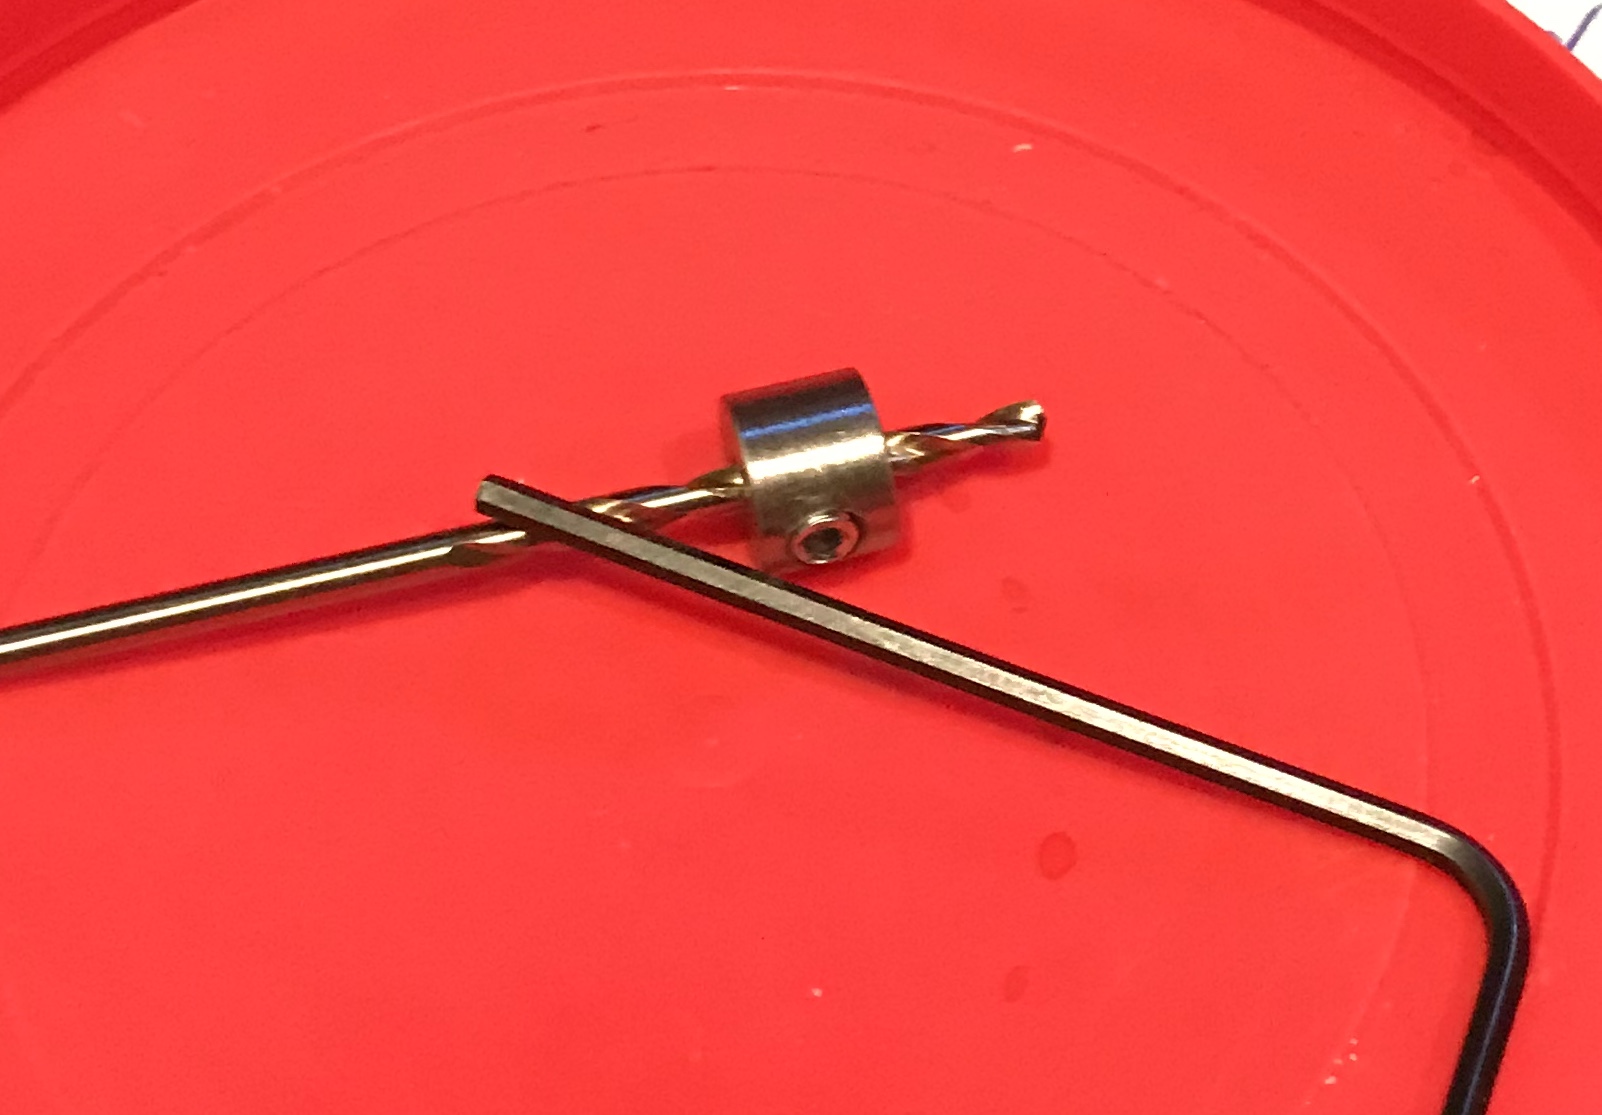
All that remained was adding the corner protectors and the front pull. I was concerned that I might drill too deeply when adding the corner protectors, so I made a drill stop for a 5/64" drill. Drill rod was placed in the chuck, faced, chamfered, and drilled with a #47 drill (about 0.001" larger then 5/64") to a depth of 0.30". I was unable to part this off at 0.25" so it was cut off with a hacksaw and then faced and chamfered. This tube was then cross drilled and tapped 6-32. I only had a starting tap and a broken tap in this size. The starting tap only cut a few threads before bottoming out. The broken tap was ground flat and then a slight angle was ground on each of the three flutes. This did the trick and finished the threads all the way through the hole. A 6-32 set screw was inserted to complete the stop. All of the corner protectors were installed without difficulty.
The screws for the front pull were quite small requiring a #55 drill. The cordless drill cannot hold drills this small. I pulled out the old hand crank drill and it was capable of holding drills this small. The holes for the pull were marked and drilled. The screws were installed completing a beautiful chest.
A plaque for the chest was prepared. A 1 7/8" X 3" sheet of 1/16" brass was cut with a hacksaw. It was squared up in the mill after clamping across a 1-2-3 block and held against a 1-2-3 block in the vise square to the part's one good side. The faces and sides were then sanded smooth with successively 220, 320, 600, 1000, and 1500 grit paper.